It all depends on the material!
Checking the material and coating of the tent fabric before you start repairing your tent will help you choose suitable glue, patches and repair method:
Generally, tent canvas is made from a variety of nylon (polyamide) types or polyester.
We recommend the McNett Seam Grip repair sealer in the case of a polyurethane (PU) coating. With this adhesive, glued-on patches usually hold, and the repaired areas continue to withstand heavy loads.
For silicone-coated tents, we recommend the McNett SilNet seam sealer. As a guideline: holes and tears are better sewn than glued with this type of tent.
Please Note: The patch should have the same coating as the tent fabric to permanently adhere to it.

Before you repair your tent, check its material construction. | photo: Vaude
Mend small holes in the PU coating

Small, circle-shaped holes in the tent fabric are often caused, for example, by thorns. Holes of this type with a diameter of about one centimetre can be mended quite quickly, especially in PU-coated camping and trekking tents.
- Clean the area: Before you start patching up a hole, you should always clean and degrease the damaged area. Cleaning with an alcohol swab from your first aid kit works well.
- Apply repair adhesive: Then drip a small but sufficient amount of McNett repair glue on the damage and let it dry.
Glue larger holes in a PU coating
Round and slightly larger holes in PU ( polyurethane)-coated tent fabric are best covered with a suitable patch for a permanent repair.
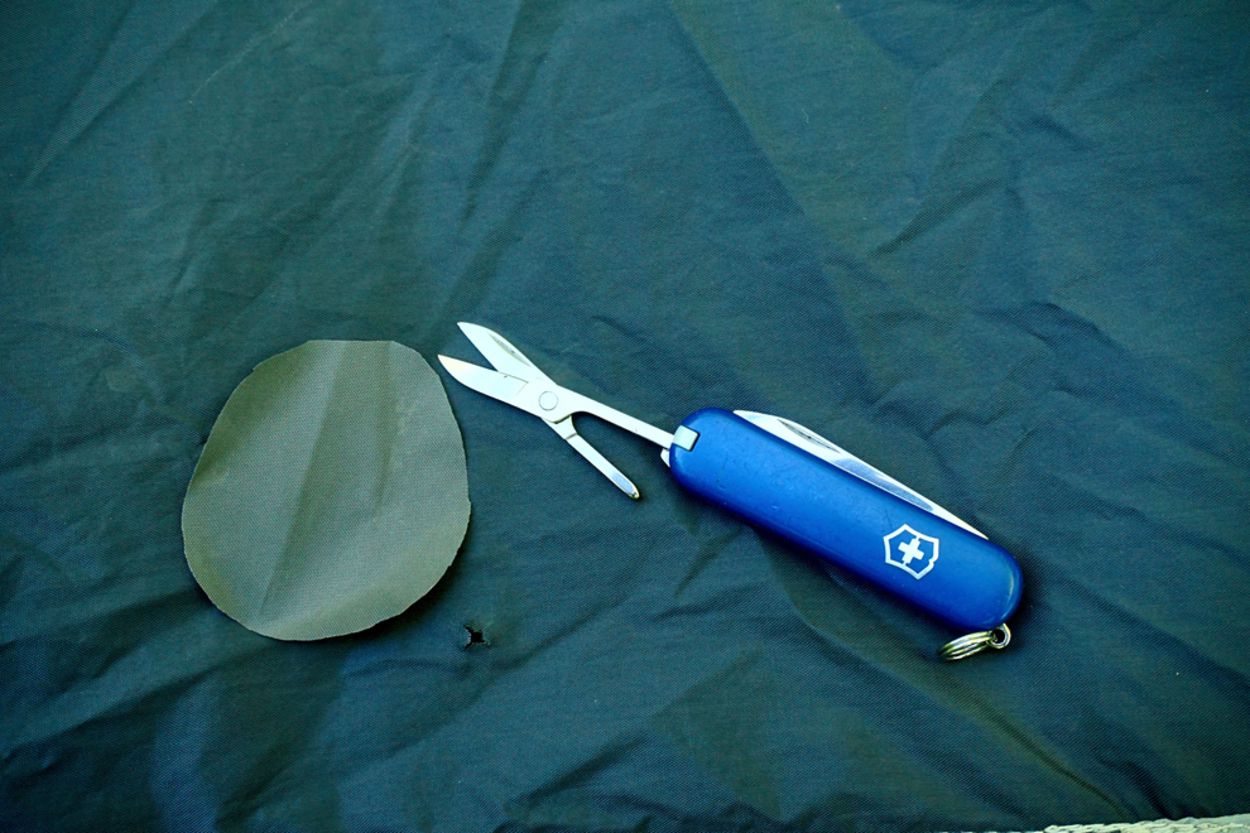
- Cut the patches to size: The repair patch should be large enough so that the patch covers the hole on all sides by approx. Three centimetres.
- Tip: If you don’t have a suitable patch with you on your trip, use the tent’s stuff sack. A stuff stack usually consists of the same material as the outer tent, so there are no problems with the coating.
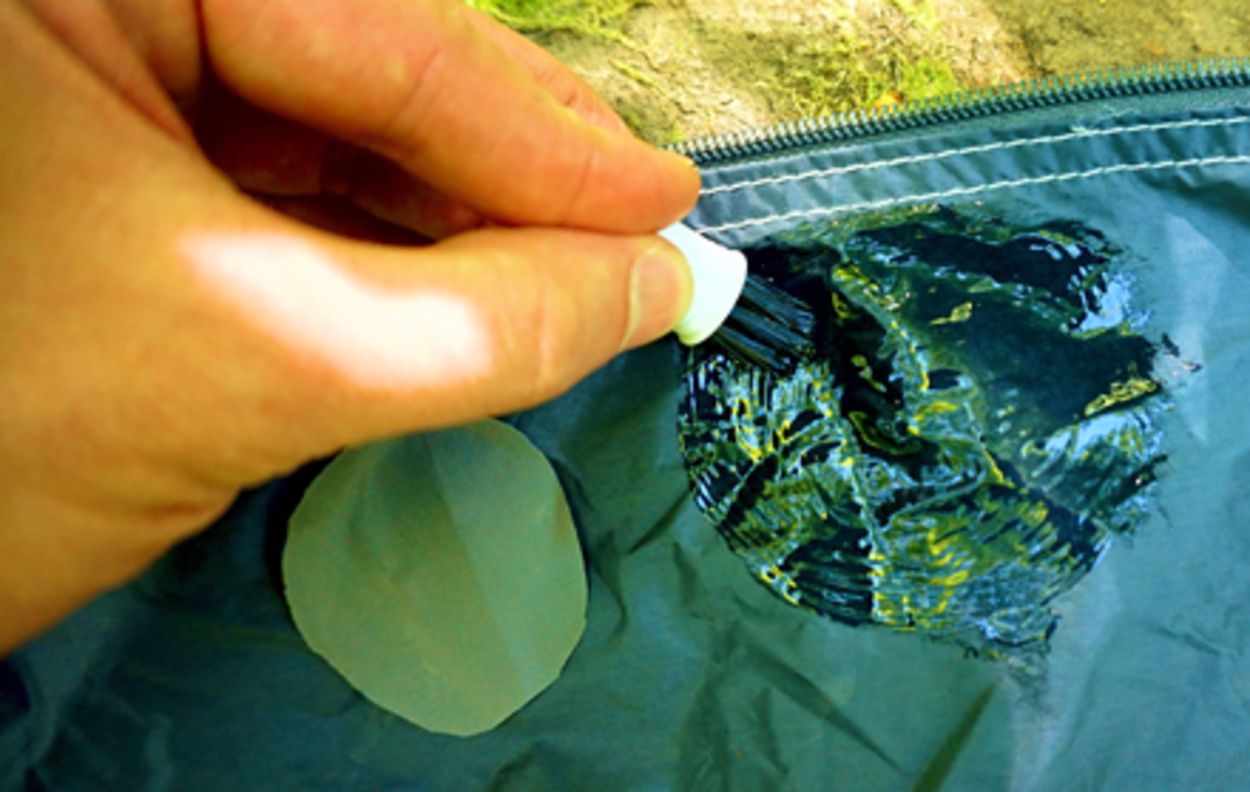
- Applying the glue: Using a brush, apply the glue to the already cleaned outside tent fabric. Apply a thin layer slightly larger than the patch.
- Apply patches: Smooth the patch down. If necessary, smooth out air bubbles towards the edge.
- Drying: Now, let the patched area dry sufficiently.
- Note: You can shorten the drying time, for example, by placing a cup of hot water on the patch. Caution, the cup must not be too hot!
- Play it safe by doubling up: If you want to be on the safe side, you can also apply a patch to the inside of the tent or cover the hole with McNett Tenacious Tape (only suitable for PU coatings).
DIY: Sew small tears in the tent yourself
Unlike holes, tears in the tent fabric (regardless of the coating!) should generally be sewn to prevent further tearing. If you have a silicone-coated tent, it makes sense to sew round holes because the seam sealer McNett Sil Net is not as strong as the repair adhesive for PU-coated tents.
- Clean the area: The first step for repairing a tent is usually to clean the affected area. Please be particularly careful here so as not to extend the damage any further.
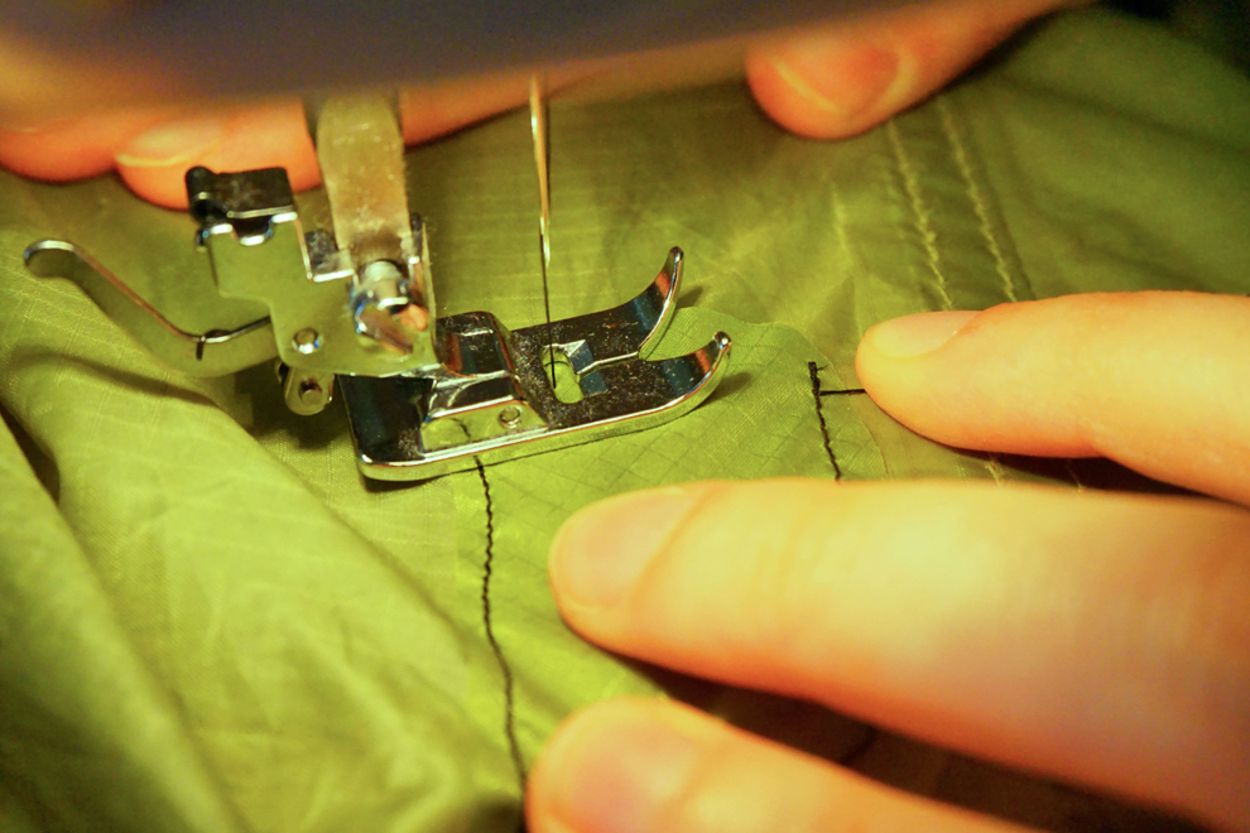
- Sewing a tear: To prevent further tearing, you should sew the tear together. You can do this with needle and thread; at home with a sewing machine. Sailing thread is suitable as a thread.
- Seal the seam: Once you have carefully sewn the tear, seal the patched area with the appropriate seam sealant/repair adhesive. Spread a thin, closed film over the seam with a bit of overlap.
- Cover the seam: Since sewing by hand is never as accurate as sewing with a machine, cover a manual seam with a patch. To do this, proceed as described above. In the case of a silicone-coated tent, you should also sew on the patch and seal the seam to fix the patch permanently.
Repairing extensive or complicated tent damage
Some holes and tears are best left to the experts—usually when the damage to the inner or outer tent is more extensive. Many tent manufacturers, such as Vaude, offer an excellent and comprehensive repair service so that your favourite outdoor accommodation is fit for the next camping adventure after a short stay at a health resort. Information about the duration, costs and procedure of a tent repair can usually be obtained directly from the brand’s customer service or their direct website.

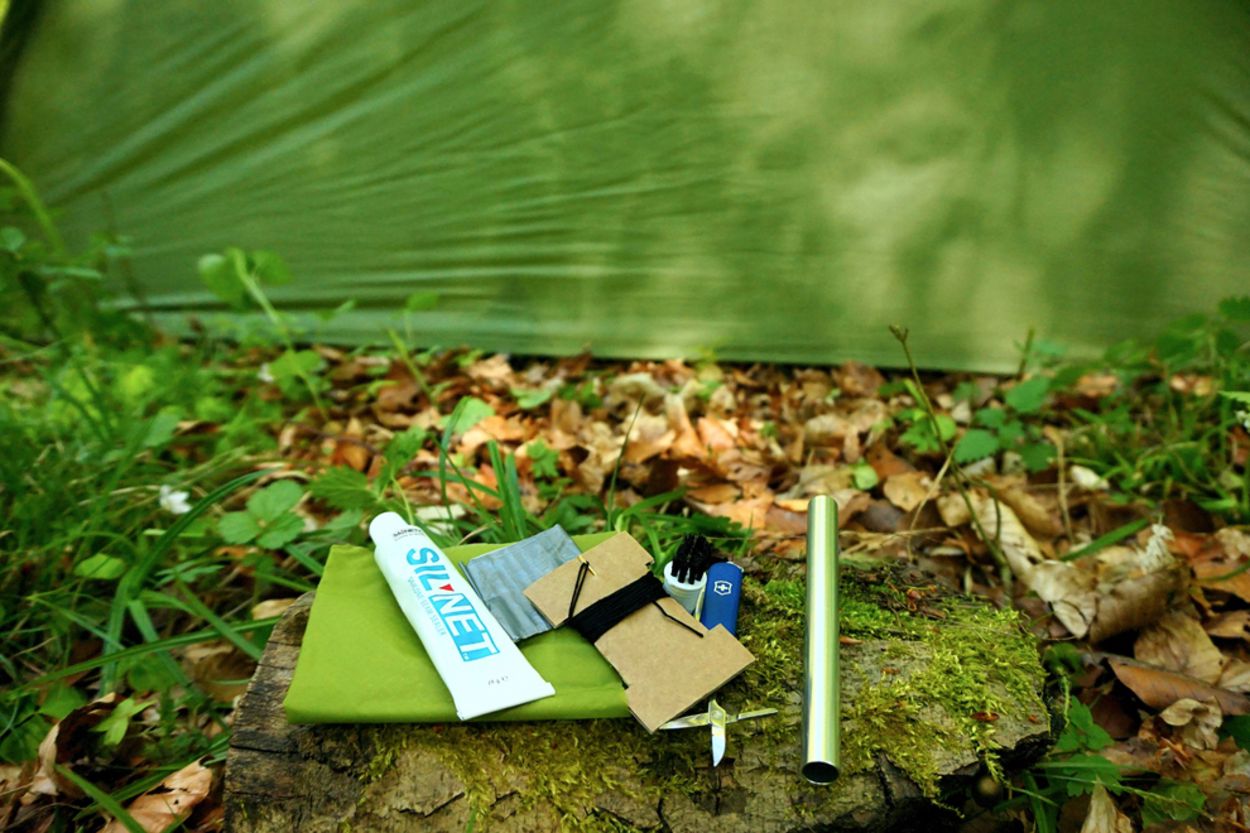
Mending a tent while on the move: What you need is this

Ensure you don’t have to interrupt your trekking tour or camping holiday just because your tent is damaged by always having the following basics with you.
- Needle and thread
- Fabric adhesive tape
- Tent repair kit with suitable glue and patches
- Repair sleeve
Summary
Whether you are concerned about a hole in the inner tent or a tear in the outer tent: repairing a tent is easier than you think. It is essential to know the material and coating and to choose a suitable repair kit. Then it’s only a few simple steps, and your all-terrain outdoor tent is in shape again!
More camping stories in the Bergzeit Journal
- Packing list for camping: all you need for your next camping trip!
- Wild camping in Europe – where it’s allowed and where not
- 5 top recipes for when you’re camping
- GSI Outdoors: for all your outdoor kitchen needs