A ski tour will quickly reveal those skiers who show their skis some lovin’ and those that neglect. Especially on trails through forests, it’s probably not merely your outstanding skiing prowess that makes you faster than your fellow skiers! Just one look at the underside of the skis indicates that most ski touring enthusiasts often don’t like the chore of waxing skis or sharpening edges. By following some straightforward steps for a do-it-yourself ski service, nothing is standing in the way of some fantastic pow days with a pair of skis that will reward you for your efforts.
Waxing skis: A must-do for devoted ski tourers

Especially when it comes to cross-country skiing, ski maintenance directly impacts the fun factor, so waxing the skis should be part of typical preparations. However, ski tourers should also acquaint themselves with wax. Admittedly, well-waxed skis’ advantages are less noticeable in deep snow than on the cross-country ski trail or piste. Yet especially when things get tedious, and snow conditions become difficult, fast skis come in handy. In addition, the durability of a ski will also be impacted in the long term. Besides that, waxed skis are easier to turn and save energy when skiing.
The topic “waxing skis” is undoubtedly a science in itself. Yet even with basic know-how, which you can read about in this article, you will still have a lot of fun with your touring skis for years to come!
A short intro to wax types

In principle, there are two different types of wax for ski care: hot wax and cold wax. The difference lies in the quality, result, and application type. While the hot wax is applied with an iron so that the liquid wax can penetrate deep into the pores of the ski surface, the cold wax is applied only superficially. Cold wax has the advantage of being more straightforward and quicker to use – but it does not come close to the abrasion resistance of hot wax.
Hot wax for skis is also available as a fluorine- and fluorine-free variant. Fluorine waxes are more hydrophobic than comparable waxes – they, therefore, glide better. Incidentally, they are available with different fluorine contents. However, the higher the fluorine content, the more expensive the waxes are to prepare with fluorine waxes. Fluorine waxes are standard in the racing sector; LF waxes (low fluorine content) represent an optimum compromise for use on the slopes and cross-country skiing. However, a fluorine-free universal wax (hydrocarbon wax) should be used for ski touring or freeride skiing, as the temperature range is considerably more comprehensive.
In addition to hot wax, in combination with the surface structuring, there are numerous possibilities to get the best out of the waxing process for different snow conditions and temperatures. However, this complex preparation is unnecessary for all-around use and ski touring or freeride ski use. Suppose you would like to delve deeper into the technology. In that case, we recommend the manufacturer sites from Toko, Holmenkol or Swix, where you will find in-depth information on the different “wax strategies”.
Waxing skis with hot wax: Step by step instructions
I. The tools
The following essential tools are required for waxing skis:

- Iron – if necessary, the discarded iron from grandma will do.
- Attachment for the skis – ideally, you can buy ski fixations or make your fixation.
- Universal base wax (all-in-one hot wax, approx. 0°C – 30°C) >> Note: Normally sufficient for touring skis or freeride skis. This also covers the most extensive temperature range!
- Plastic scraper blade
- nylon brush
- Eventually, repair pen (graphite or transparent) and metal blade >> Note: When removing with the blade and brushing, always work away from the tip of the ski!
II. Preparation

- Dry and clean the underside of the ski on the surface with a cotton cloth.
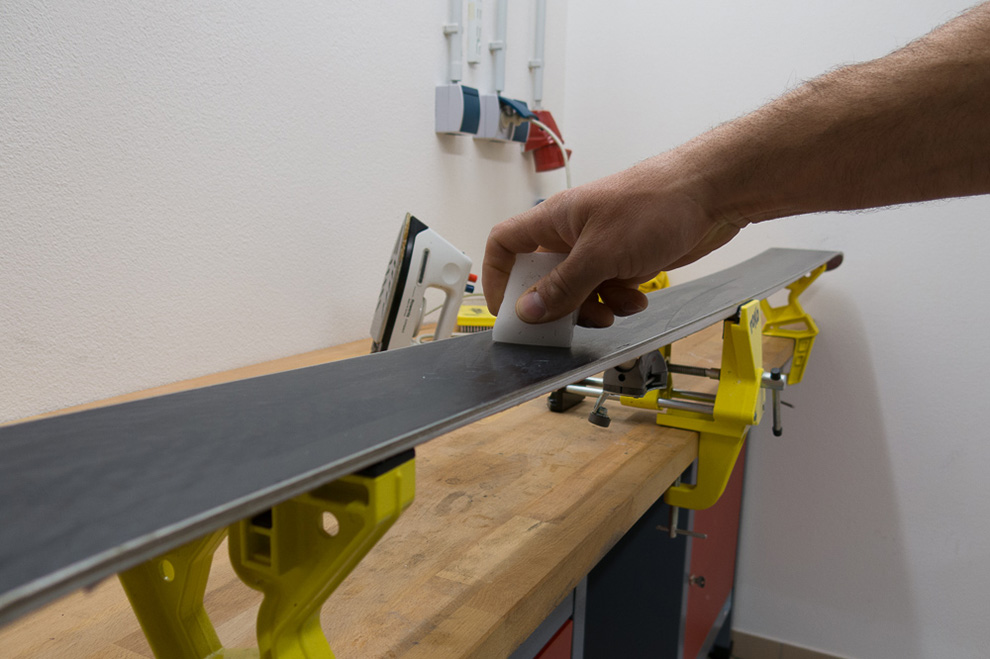
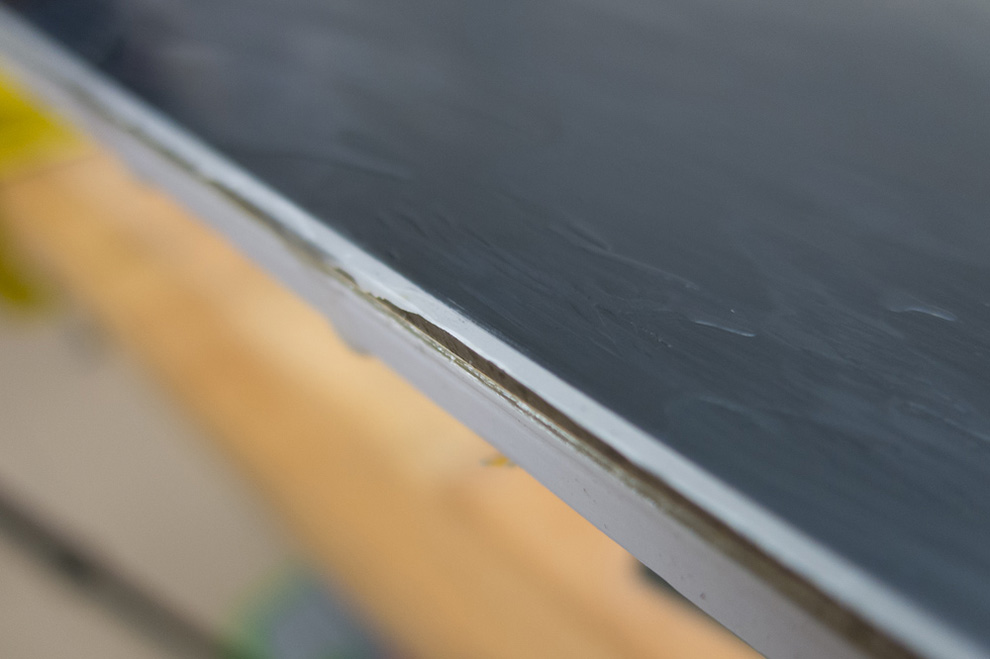
- Repair the roughest scratches beforehand: For the black covering, use the graphite pins; for white or coloured surfaces, use the white repair pins. For repairing, the pencil is heated with a lighter or iron and dripped directly into the area to be repaired on the ski. Remove excess with a metal file (file towards the edge) and a metal scraper.
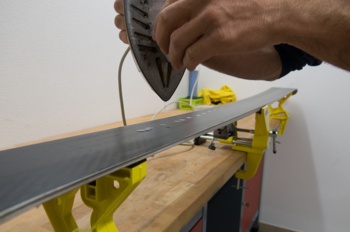
- Finally, the surface is cleaned in three steps:
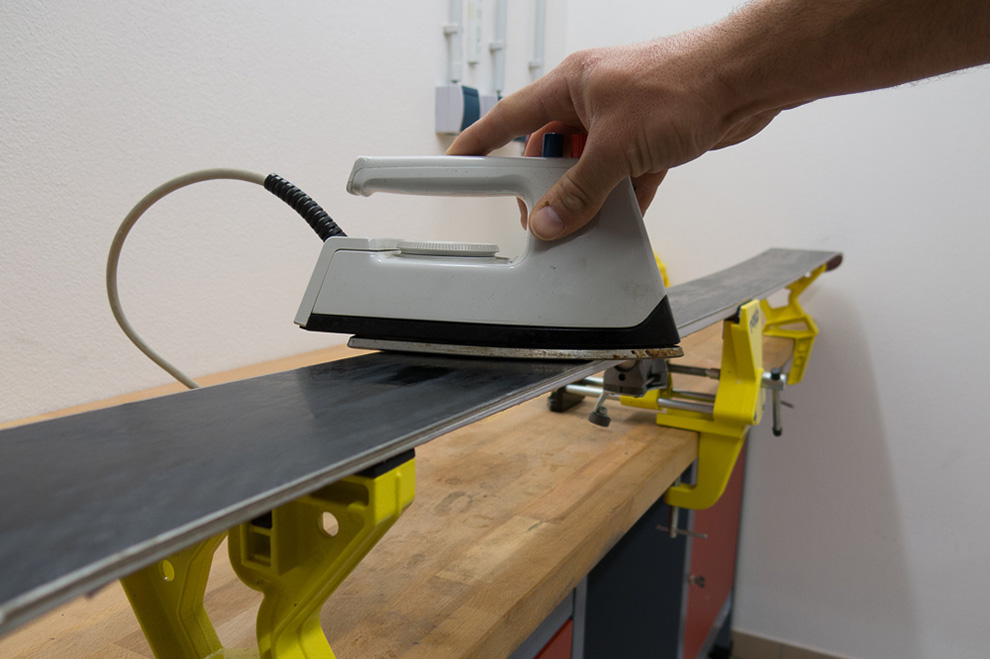
(1) Wipe evenly with hot wax.
Note: Alternatively, the wax can also be dripped with an iron. However, the amount of wax used is much higher, and more must be removed.
(2) Remove the wax while still warm and brush it out.
Note: The pores of the coating are cleaned with warm wax.
(3) Alternatively, use a special cleaning agent.
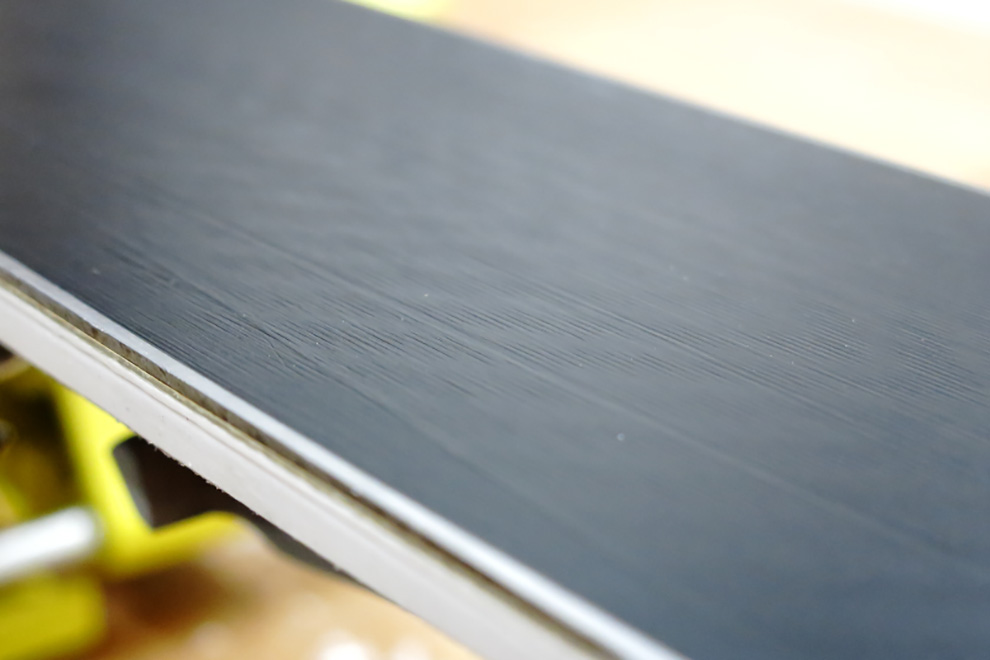
Cleaning of the ski surface is shown in the following photo gallery:
III. Using the wax – here’s how
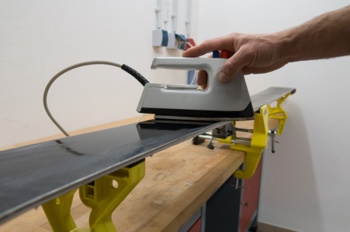
- Apply hot wax to the ski with iron or rub as described for cleaning ( less waste).
Temperature tip: Set temperature approx. 140°C. It is best to use the “wool/silk” setting. As soon as the melted wax starts to smoke, the temperature must be reduced slightly! - Now spread the hot wax evenly over the base. (If the skis are to be stored over the summer, the edges should also be covered with wax to protect them against corrosion.)
Tip: Move the iron slowly with circular movements over the surface. Similar to ironing shirts, never stay in one place longer. This can damage the ski core! - Let the skis cool down at room temperature for at least 30 minutes.
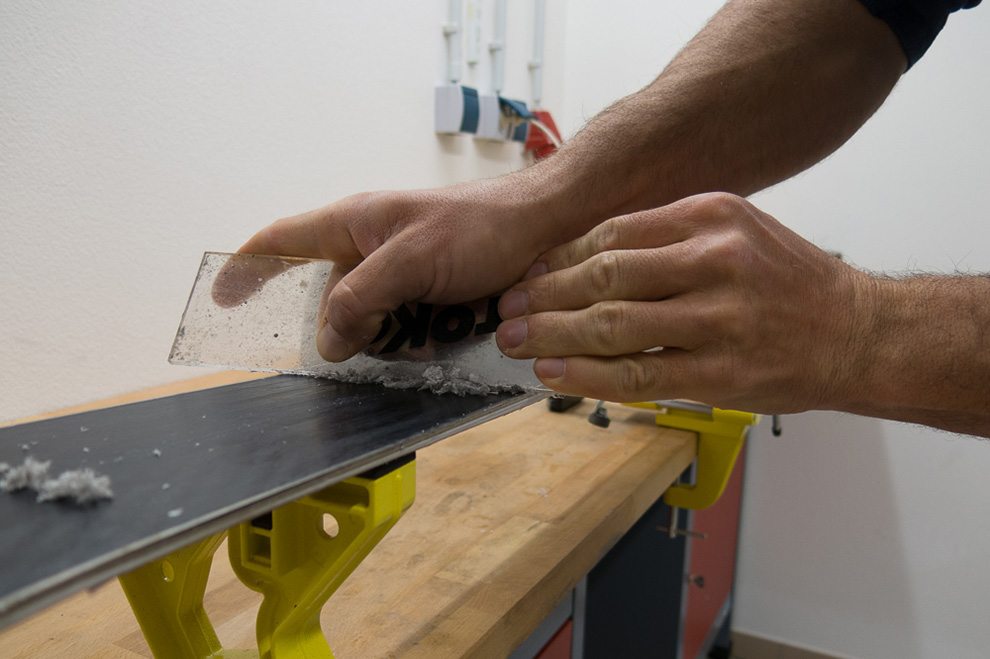
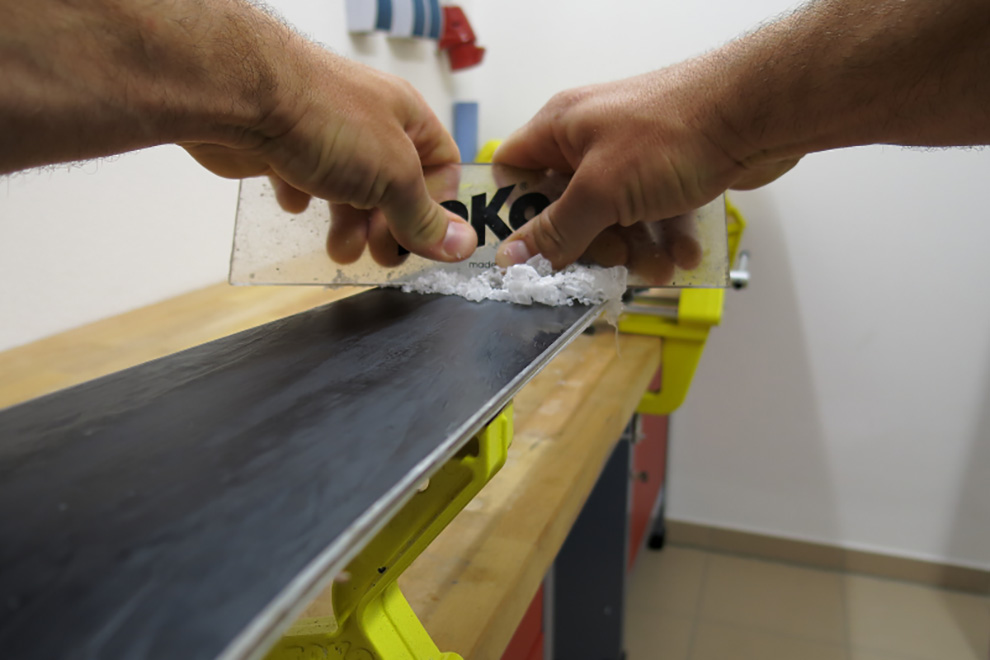
- Remove the cooled wax with the scraper until the excess has been removed. Only the wax in the pores of the coating is essential – any lot must, therefore, be removed!
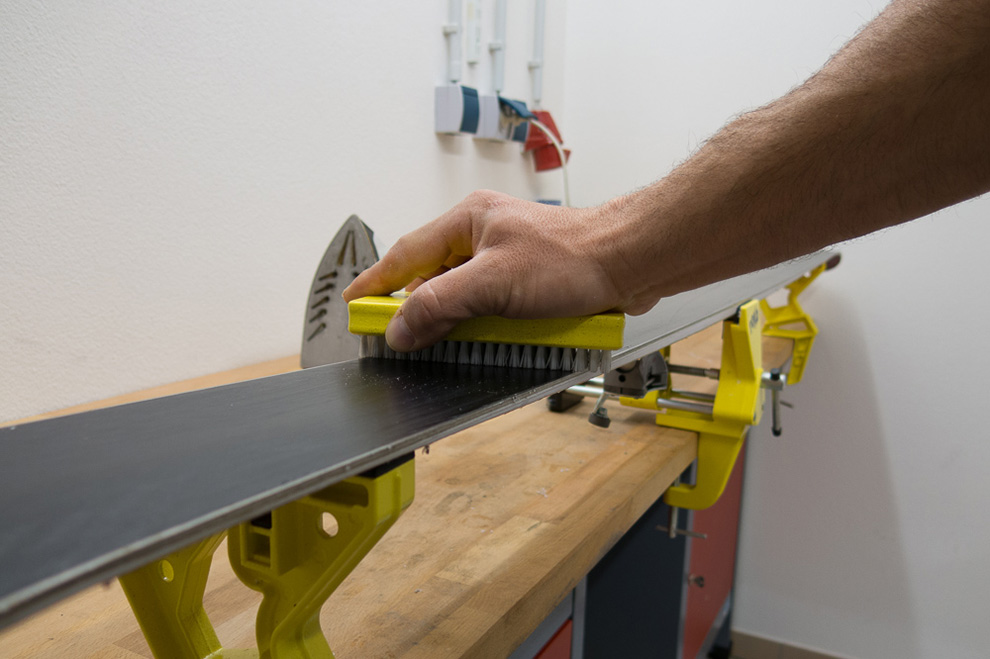
- The wax is then removed from the surface structure with the brush. For this purpose, it is brushed out approx. five times – starting from the shovel.
- Finally, remove any residue with a soft cotton cloth.
- Finished! Go ski!
Waxing the base of the ski shown here in the photo gallery:

How often and when should the ski be waxed and repaired?
Waxing and touching up – these are two very different pairs of boots! Ideally, it would be best to wax your ski whenever the temperature changes significantly and snow conditions change. Ski waxing should be considered especially when switching between wet and powder snow. Professionals wax their skis even more often – this depends on each individual’s discretion.
Repairing, on the other hand, is not necessarily quite as often. If you treat your skis with care and don’t drag every stone with you along the way, you won’t have to repair scratches on the surface and nicks on the edges every year. Nevertheless, we advise you to check the skis after every season.
It is certainly worth having a few more skis available for various snow conditions in the long run. It is not for nothing that the famous “stone skis” are always taken out of the cellar when snow conditions are poor. It’s better to chafe a few already maltreated skis than to expose the brand new, expensive skis (or splitboard) to stones!
Checking ski bindings and storing them after the season
I. The Binding Check
- Spray all moving parts with penetrating oil (e.g. WD40) and remove the excess oil after a while with a cloth.
- Check screw tightness! Nothing should be loose here.
- Never change the release hardness of the binding. This has been preset for long-term use.
- Hint: If in doubt, have the release hardness checked by your specialist dealer.
II. Storing
- Ideally, the skis should be stored lying down, i.e., the surface facing upwards.
- The wax layer provides sufficient protection against dust and dirt over the summer.
- The room climate should be dry and cool – even a few hours in a wet and cold environment will cause rust on the edges.
Get ready for the ski season!
Now your skis have been prepared for the start of the upcoming winter season. There’s nothing left to do then get out there! And while we’re on the subject, here are some more helpful ski-related reads in the Bergzeit journal.
- The essentials for a day of freeride skiing: A packing list
- Comparing airbag systems: An avalanche backpack overview
- Ski touring bindings and what you need to know: A buyer’s guide